Tìm sự độc đáo. đề can cửa sổ ở tình trạng tuyệt vời chỉ có trên Alibaba.com .. đề can cửa sổ là một cách bỏ túi để mở rộng tủ quần áo của bạn để bạn không bao giờ phải xem lại và cũng rất tốt cho môi trường vì chúng giảm thiểu chất thải .. đề can cửa sổ đang nhanh chóng trở nên phổ biến như một lựa chọn hợp thời trang và có ý thức xã hội.
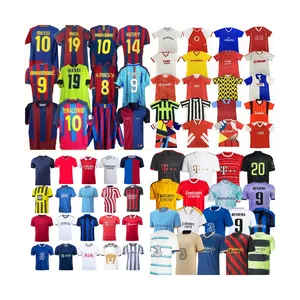
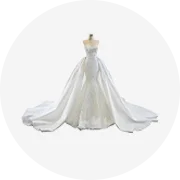
đề can cửa sổ được cung cấp trên Alibaba.com bao gồm nhiều loại mặt hàng khác nhau theo mọi kiểu dáng, có thể là quần áo bình thường, quần áo thiết kế có thương hiệu hoặc thậm chí quần áo dành riêng cho từng dịp như váy cưới .. đề can cửa sổ thật tuyệt vời để tìm những phần thú vị phản ánh cá tính của bạn và lên ý tưởng cho những bộ trang phục độc đáo. Chúng cho phép một người thường xuyên thay đổi phong cách của họ hoặc mua cho một dịp cụ thể nào đó mà không cần phải chi quá nhiều tiền .. đề can cửa sổ cũng cho phép người mặc truy cập vào những kiểu đã được bán hết ở những nơi khác hoặc tìm những món đồ cổ điển có sức hút rất riêng.
đề can cửa sổ tạo điều kiện cho người mặc thể hiện phong cách cao cấp mà không phải trả trong phạm vi đó. Trang web chỉ có cổ phiếu. đề can cửa sổ có chất lượng tốt nhất đã được kiểm tra xem có hư hỏng hoặc lỗi nào không. Tất cả các hạng mục được làm sạch sâu và sửa chữa để hoàn thiện cho người dùng tiếp theo. Đó là một cơ hội tuyệt vời cho. đề can cửa sổ người bán và người bán buôn để mua số lượng lớn các mặt hàng này với số lượng lớn.
Chọn từ nhiều loại. đề can cửa sổ được bán trên Alibaba.com, để tìm những sản phẩm phù hợp nhất. Được cung cấp bởi những người bán đáng tin cậy, hãy yên tâm rằng các mặt hàng sẽ đáp ứng các tiêu chuẩn của bạn và khiến bạn muốn mua thêm. Với giá rẻ như vậy, mua những thứ này là một món hời hoàn hảo.