All categories
Featured selections
Trade Assurance
Buyer Central
Help Center
Get the app
Become a supplier


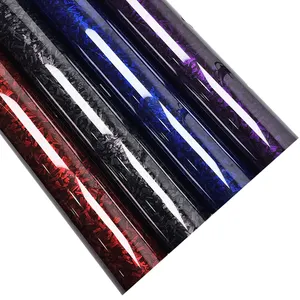


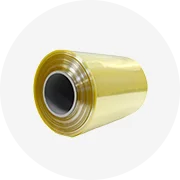
Mua sỉ bọc xe vinyl tại Alibaba.com để nhận được màng chuyển với mức giá ưu đãi một cách thuận tiện. Hãy cho chúng tôi biết kích thước, tùy chọn màu sắc và mẫu bạn thích và chúng tôi sẽ tùy chỉnh chúng cho bạn trong thời gian sớm nhất có thể.
Chúng tôi đã so sánh nhiều keyword vật liệu để chuyển phim và chúng tôi chọn vật liệu có thể giặt được và lâu dài cho nó. Có thể sử dụng bọc xe vinyl để in hoa văn trên quần áo, vì hoa văn sẽ không bị nứt khi giặt và màu sắc cũng không bị phai khi giặt. Và các vật liệu chúng tôi sử dụng sẽ không gây hại cho da. Đồng thời, chúng tôi có độ dày thích hợp và khả năng thấm tốt của bọc xe vinyl . Vì vậy, nó có thể được sử dụng để in cho áo và quần áo cho mùa hè. Ngoài ra, chúng tôi có rất nhiều lựa chọn về kiểu dáng và một loạt các kích thước cho bạn và cung cấp cho bạn nhiều sự lựa chọn hơn cho đơn đặt hàng của mình. Dù bạn cần mẫu mã và màu sắc nào, chúng tôi sẽ cung cấp những sự lựa chọn phù hợp cho bạn. Chức năng, độ bền và dễ bảo trì chúng làm cho bọc xe vinyl xứng đáng.
Mua sỉ bọc xe vinyl tại Alibaba.com và nhận được các sản phẩm bạn cần. Mua sắm những sản phẩm bạn cần tại Alibaba.com và tận hưởng sự tiện lợi.