All categories
Featured selections
Trade Assurance
Buyer Central
Help Center
Get the app
Become a supplier
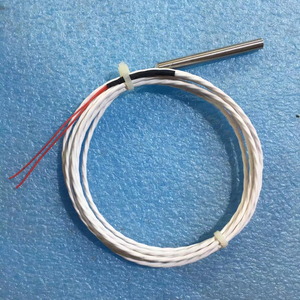


Quà tặng đáng kinh ngạc cho bản thân hoặc doanh nghiệp của bạn. cảm biến daikin 137531j có sẵn tại Alibaba.com với các đề nghị hấp dẫn và nâng cao hiệu suất của máy điều hòa không khí của bạn. Các. cảm biến daikin 137531j được thiết kế với các tính năng và công nghệ mới nhất giúp điều hòa không khí trở nên nổi bật. Các. cảm biến daikin 137531j sẽ cho phép bạn quên đi tất cả các loại gián đoạn và ngừng hoạt động ngoài ý muốn do trục trặc và hỏng hóc.
Các chất liệu và kiểu dáng đặc biệt được sử dụng trong những công việc này. cảm biến daikin 137531j được đặc trưng bởi tính sáng tạo thúc đẩy độ bền. Các. cảm biến daikin 137531j cung cấp các dịch vụ tối ưu để có tuổi thọ lâu dài vì chúng chống lại các lực tác động bên ngoài chẳng hạn như nhiệt độ khắc nghiệt có thể tạo điều kiện cho sự xuống cấp nhanh hơn. Như một sự đảm bảo về chất lượng, tất cả. cảm biến daikin 137531j đáp ứng các tiêu chuẩn quy định về chất lượng. Việc dễ dàng cài đặt chúng làm tăng tính tiện lợi khi sử dụng, giúp chúng rất thiết thực cho ứng dụng của bạn.
Chất lượng đáng kinh ngạc của những mặt hàng này sẽ mang lại cho bạn nụ cười tuyệt vời khi bạn nhận ra chúng 'đáng giá từng xu bạn sẽ chi cho chúng. Khám phá phạm vi rộng và sự tiếp thu. cảm biến daikin 137531j tại Alibaba.com và chọn từ khóa hoàn toàn phù hợp với nhu cầu của bạn. Sử dụng các giao dịch cơ hội có sẵn trên trang web cho. cảm biến daikin 137531j nhà bán buôn và nhà cung cấp khi bạn đưa doanh nghiệp của mình lên cấp độ cao hơn.