Popular in your industry


Top categories


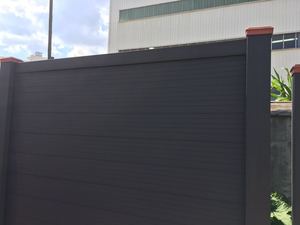
About painting white fence
Introduction
Transforming your backyard can be as simple as painting your fence. A well-painted white fence not only enhances the aesthetic appeal of your property but also increases its value. This article provides a comprehensive guide on how to perfectly paint your fence in five easy steps. From assessing your fence and gathering materials, preparing your fence for painting, choosing the right paint and tools, to the actual painting process and maintaining your newly painted fence, we've got you covered. Let's dive in and learn how to give your backyard a fresh, new look.
Step 1: Assessing Your Fence and Gathering Materials
Before starting your fence painting project, it's crucial to assess the condition of your fence. Locate your property markers to determine the fence line. Check for any obstructions like sprinklers, boulders, or vegetation that might interfere with the painting process. Also, consider the location of utilities and underground elements. If you're replacing an existing fence, discuss with your contractor how to handle end and corner posts. Remember, a thorough initial walkthrough with your contractor can help clarify expectations and prevent potential issues.
Step 2: Preparing Your Fence for Painting
Before painting your fence, it's crucial to prepare it properly. Start by removing any leaves, grass, or weeds along the base of the fence. Then, clean, scrape, and sand your fence with medium-grit or fine-grit sandpaper. You can use a pressure washer or a garden hose with a power nozzle to clean the fence and remove loose paint. If there's any mold or mildew, sponge the spots with a 50/50 solution of bleach and water. Lastly, check your fence for termite or insect damage and replace any damaged wood.
Step 3: Choosing the Right Paint and Tools
Choosing the right paint and tools is crucial for a successful fence painting project. Opt for a high-quality exterior acrylic latex paint. This paint provides excellent coverage and durability, standing up to the elements and ensuring lasting beauty. It's a true white color that works well for fences and other exterior surfaces. Remember, investing in good paint can save you from frequent touch-ups and repainting.
Step 4: Painting Your Fence
To paint your fence, start by painting the basic posts and frame. Then, paint the pickets before they're attached to the fence. This prevents drips and excess paint in corners and crevices. Prime and paint one side of the pickets, let it dry, then flip them over and paint the reverse side. After attaching the pickets to the frame, touch up any places that need paint. This method saves time, creates a smoother finish, and prevents excess paint drips.
Step 5: Maintaining Your Newly Painted Fence
Maintaining your newly painted white fence is crucial for its longevity. Regular inspection and minor DIY repairs can prevent major issues. Clean the fence surfaces to remove dirt and mildew, and reapply a protective sealant every one to two years to safeguard against moisture, pests, and UV damage. Remember, prevention is worth more than a cure when it comes to your fence. Regular maintenance ensures your fence remains aesthetically appealing and structurally sound.
Conclusion
In conclusion, painting your fence white can significantly transform your backyard, giving it a fresh, appealing look. The process involves assessing your fence and gathering the necessary materials, preparing your fence for painting, choosing the right paint and tools, painting your fence, and maintaining it. Remember, the key to a successful fence painting project lies in thorough preparation, using high-quality paint, and regular maintenance. With these steps, you can ensure your fence remains aesthetically pleasing and structurally sound for years to come.