Phổ biến trong ngành của bạn


Các tìm kiếm liên quan:


Các danh mục hàng đầu


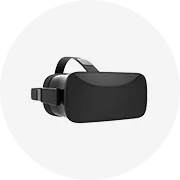
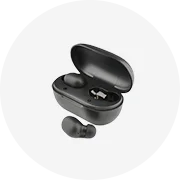
Giới thiệu về miếng đệm khác
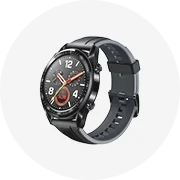
Nhiều người thích đeo đồng hồ và những thứ này. miếng đệm khác cung cấp bản nâng cấp hoàn hảo cho đồng hồ đeo tay truyền thống. Có sẵn với giá rẻ tại Alibaba.com, những. miếng đệm khác không chỉ trông đẹp mà còn đi kèm với một loạt lợi ích. Chúng bắt kịp xu hướng và mang đến điều gì đó khác biệt so với đồng hồ thông thường hoặc điện thoại thông minh.
Một trong những lợi ích tuyệt vời của chúng. miếng đệm khác là chúng cho phép người dùng tìm chìa khóa, điện thoại hoặc các thiết bị khác bị mất. Bạn có thể kết nối điện thoại thông minh với các sản phẩm này trên Alibaba.com và điện thoại cho vòng đeo tay bất cứ khi nào bạn muốn. Nhiều sản phẩm trong số này đi kèm với tính năng theo dõi thể dục như một trong những phẩm chất chính của chúng. Những điều này giúp những người có mục tiêu tập thể dục theo kịp bài tập và các bước. Họ có thể đếm những thứ như nhịp tim, calo, giấc ngủ và nhịp tim.
Mặc những thứ này. miếng đệm khác trên cổ tay có thể có nghĩa là lúc nào cũng không cần sử dụng điện thoại thông minh nữa. Trả lời tin nhắn và trả lời cuộc gọi điện thoại khi đang di chuyển, điều này đặc biệt hữu ích khi tập thể dục. Kiểm tra các tài khoản mạng xã hội có liên kết tới Facebook, Twitter và Snapchat. Ngay cả khi thực hiện các hoạt động như chạy, đạp xe và bơi lội, những sản phẩm này vẫn có thể được đeo theo cách mà điện thoại không thể sử dụng được.
Có rất nhiều. Các tùy chọn miếng đệm khác tại đây tại Alibaba.com để phù hợp với nhiều ngân sách. Sản phẩm đến từ nhiều nhà cung cấp và nhà sản xuất khác nhau trên khắp thế giới, những người cung cấp các mặt hàng chất lượng cao. Giữ kết nối với vòng đeo tay thông minh và mua sắm trực tuyến ngay hôm nay.