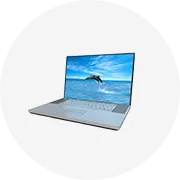
Types of MTX Audio Components
MTX Audio is a premier brand in the automotive audio industry, renowned for delivering high-performance sound systems tailored to audiophiles and car enthusiasts alike. With decades of innovation behind them, MTX products are engineered to enhance every aspect of your listening experience through superior components like speakers, subwoofers, and amplifiers.
Whether you're building a daily driver with immersive sound or tuning up for a competition-level car audio system, MTX offers solutions that combine power, clarity, and durability. Each component plays a unique role in achieving sonic excellence:
Speakers
MTX Audio's car speakers are designed to deliver crisp, detailed midrange and high-frequency sound while maintaining structural integrity under demanding conditions. These speakers feature silk dome tweeters for smooth high-end response, stamped steel frames for enhanced rigidity, and integrated crossovers for optimized frequency separation.
Advantages
- Exceptional clarity across mid and high frequencies
- Durable construction withstands road vibrations
- Versatile size options (6.5", 6x9", etc.)
- Integrated crossover ensures balanced output
Limitations
- Not ideal for deep bass reproduction alone
- May require additional acoustic treatment
- Limited volume headroom without proper amplification
Best for: Front stage setups, door installations, and enhancing OEM systems
Subwoofers
MTX subwoofers are built to deliver powerful, room-filling bass that adds depth and dimension to any music genre. Featuring cast aluminum frames for heat dissipation, high-excursion cones for greater air movement, and copper voice coils for improved efficiency, these subwoofers are engineered for both performance and longevity. Many models also incorporate the patented VCS (Voice Coil Stabilization) System to ensure consistent operation even at high volumes.
Advantages
- Deep, punchy bass with minimal distortion
- High thermal and mechanical stability
- Versatile enclosure compatibility (sealed, ported)
- Wide range of power handling options
Limitations
- Require dedicated amplifier for optimal performance
- Larger enclosures may take up trunk space
- Higher cost compared to entry-level subs
Best for: Bass lovers, trunk-mounted enclosures, SPL competitions
Amplifiers
MTX amplifiers serve as the powerhouse of any high-quality car audio system. These amplifiers provide clean, efficient power to drive both speakers and subwoofers, ensuring maximum performance without compromising sound quality. Available in a wide range of configurations — from compact mono blocks to multi-channel Class D amps — MTX offers solutions for everything from mild upgrades to full-blown competition builds.
Advantages
- High RMS power output (100W–3000W+)
- Low THD (Total Harmonic Distortion) for accurate sound reproduction
- Adjustable crossovers and bass boost controls
- Excellent thermal and electrical protection circuitry
Limitations
- Installation can be complex for beginners
- Requires proper wiring and battery upgrades at higher power levels
- Premium pricing for top-tier models
Best for: Powering entire audio systems, driving multiple subs, custom tuning
Enclosures & Accessories
While not always included in basic kits, MTX also offers a comprehensive line of speaker boxes, subwoofer enclosures, and mounting accessories designed to complement their drivers. From pre-fabricated sealed and ported enclosures to custom-fit speaker pods and brackets, these products help optimize acoustics and installation ease.
Advantages
- Perfectly matched to MTX speaker/sub specs
- Optimized internal volume for best performance
- Space-saving designs for various vehicle types
- Easy-to-install solutions for DIYers
Limitations
- May limit customization for advanced users
- Additional cost beyond core components
- Some enclosures may not fit non-standard vehicles
Best for: Quick installations, guaranteed compatibility, space-constrained setups
Component | Primary Function | Key Features | Power Range | Recommended Use |
---|---|---|---|---|
Speakers | Mid/high-range sound reproduction | Silk dome tweeters, stamped frames, crossovers | 20W–150W RMS | Front stage systems, OEM upgrades |
Subwoofers | Bass frequency reproduction | Copper voice coils, cast frames, VCS cooling | 100W–1000W+ RMS | Trunk installs, bass competitions |
Amplifiers | Signal boosting and power delivery | Adjustable crossovers, low THD, thermal protection | 100W–3000W+ RMS | Full system powering, subwoofer drives |
Enclosures | Acoustic optimization and mounting | Ported/sealed designs, vehicle-specific fits | N/A | Speaker/sub installation, space optimization |
Expert Tip: For best results, match your MTX amplifier’s RMS output to the combined RMS ratings of your speakers and subwoofers. This ensures stable operation and prevents under/over-powering, which can damage components over time.
Pro Recommendation: If you're new to car audio, consider starting with an MTX component package that includes matched speakers, subwoofer, and amplifier. This guarantees compatibility and simplifies the setup process while delivering a cohesive sound signature.
Specifications and Maintenance of MTX Audio Components
Detailed Component Specifications
MTX Audio is renowned for producing high-performance car audio components designed to deliver superior sound quality across various environments. Understanding the technical specifications of these components helps users make informed decisions when building or upgrading their audio systems.
MTX Subwoofers
MTX subwoofers are engineered for deep bass reproduction with advanced design features that enhance durability and performance. These subwoofers offer high sensitivity ratings, allowing them to produce louder sounds without overloading amplifiers. This makes them ideal for both daily listening and high-impact audio experiences like car shows or mobile competitions.
The power handling capabilities of MTX subwoofers ensure they can withstand high wattage inputs, providing clean and distortion-free bass even at elevated volumes. The dual voice coil configuration offers versatile wiring options (series or parallel), giving users flexibility in matching impedance to their amplifiers.
Constructed from robust materials such as cast aluminum frames and durable rubber surrounds, MTX subwoofers are built to last. Their long-excursion drivers allow for greater cone movement, which translates into deeper and more dynamic bass response—perfect for genres like hip-hop, EDM, and rock music.
MTX Speakers
Designed for clarity and resilience, MTX speakers combine high sensitivity with weather-resistant properties. This makes them suitable for installation in challenging environments such as motorcycles, boats, or outdoor vehicles exposed to dust, moisture, and UV radiation.
With a wide frequency response range, MTX speakers deliver crisp highs, detailed mids, and rich lows, ensuring balanced sound reproduction across all musical genres. Their waterproof designs incorporate sealed enclosures and corrosion-resistant grilles, protecting internal components from environmental damage.
Manufactured using premium materials like cast aluminum and polypropylene cones, these speakers maintain structural integrity under extreme conditions while resisting warping or degradation over time. Whether used indoors or outdoors, MTX speakers provide consistent audio performance with minimal maintenance.
MTX Amplifiers
MTX amplifiers are designed to maximize audio fidelity by delivering clean, powerful output to connected speakers and subwoofers. With high signal-to-noise ratios, these amplifiers minimize background noise and interference, resulting in crystal-clear sound reproduction.
Variable gain controls allow users to precisely match amplifier output levels with source units, preventing clipping and distortion while optimizing volume balance between different components of the system. This feature is especially useful when integrating multiple amplifiers or mixing different types of speakers and subwoofers.
Built-in crossovers enable precise tuning of the audio system by filtering frequencies according to speaker size and placement. High-pass filters direct only treble frequencies to tweeters, while low-pass filters send bass frequencies exclusively to subwoofers, enhancing clarity and reducing strain on individual components.
Performance Comparison Table
Component Type | Key Features | Typical Applications |
---|---|---|
Subwoofers | High sensitivity, dual voice coils, long excursion, durable construction | Car audio systems, bass competitions, home theaters |
Speakers | Weatherproof design, wide frequency response, high sensitivity | Motorcycles, boats, outdoor vehicles, marine applications |
Amplifiers | High S/N ratio, variable gain, built-in crossover circuits | Multi-component audio setups, competition-grade systems, mobile installations |
Essential Maintenance Practices
To preserve the performance and longevity of MTX audio components, regular maintenance is crucial. Proper care ensures optimal sound quality and protects your investment against premature wear and failure.
Important: Always refer to the manufacturer's guidelines for specific cleaning products and procedures. Using incompatible chemicals or abrasive tools may void warranties and cause irreversible damage to sensitive components.
How to Choose MTX Audio Subwoofers for Resale
Selecting the right MTX subwoofer for resale requires careful consideration of multiple technical and practical factors that influence both performance and customer satisfaction. Business buyers should evaluate these aspects thoroughly to ensure they stock products that meet diverse consumer needs.
Purpose and Application
The intended use of the subwoofer is the most fundamental consideration when selecting MTX audio products for resale. Different models are engineered specifically for distinct environments:
- Home Theater: Ideal for immersive movie experiences with deep, cinematic bass response
- Music Listening: Designed for accurate low-frequency reproduction across various genres
- Car Audio: Built to withstand vehicle vibrations and deliver powerful bass in compact spaces
Smart Tip: Research your local market demand to determine which application types sell best in your region
Subwoofer Size Selection
MTX offers a comprehensive range of subwoofer sizes from 8" to 15", each with specific advantages depending on installation constraints and sound requirements:
- 8-10": Compact size ideal for small vehicles or shallow enclosures
- 12": Popular middle-ground offering balanced output and versatility
- 15"+: Maximum bass output for dedicated audio systems and competition setups
Installation Note: Consider typical vehicle types in your area when choosing size distribution
Power Handling Specifications
Understanding power ratings is crucial for matching subwoofers with appropriate amplifiers:
- RMS Power: Continuous power handling rating (should match amplifier output)
- Peak Power: Short-term maximum power capacity (less critical than RMS)
- Thermal Management: Look for voice coil venting and heat-resistant materials
Matching Rule: Amplifier power should be within ±20% of subwoofer RMS rating
Impedance Matching
Proper impedance matching between subwoofers and amplifiers ensures optimal performance and longevity:
- 2-Ohm: Higher power output but increased amplifier stress
- 4-Ohm: Balanced performance and reliability
- DVC Options: Dual Voice Coil models allow multiple wiring configurations
Wiring Tip: DVC subwoofers offer greater flexibility for different amplifier setups
Business Buyer Advice: Maintain inventory diversity by stocking models across different price points and performance categories. This allows you to cater to both entry-level customers and audiophiles. Keep at least 20% of your inventory in mid-range models with broad appeal.
Enclosure Type | Bass Characteristic | Efficiency | Best For |
---|---|---|---|
Sealed Enclosures | Tight, accurate bass with fast transient response | Moderate efficiency | Music purists and audiophiles |
Ported Enclosures | Loud, punchy bass with extended low-end | High efficiency | Party vehicles and show cars |
Bandpass Enclosures | Focused frequency range with controlled output | Variable efficiency | Competition builds and SPL events |
Material Quality and Durability
Construction materials significantly impact both longevity and sound quality:
- Cone Materials: Polypropylene offers excellent balance of rigidity and damping
- Surrounds: Rubber provides superior durability compared to foam
- Basket Construction: Cast aluminum baskets dissipate heat better than stamped steel
- Voice Coil: Aluminum wire offers lighter weight vs. copper's better conductivity
Quality Indicator: Look for multi-layer cones and reinforced surrounds
Additional Performance Factors
Several other specifications affect overall performance and customer satisfaction:
- Sensitivity Rating: Measured in dB - higher numbers indicate more efficient conversion of power to sound
- Frequency Response: Match to desired application (e.g., 20Hz-200Hz for deep bass)
- Excursion (Xmax): Measures how far the cone can move - important for SPL applications
- Build Quality: Examine terminal construction and magnet size
Technical Insight: Sensitivity differences of 3dB can equate to doubling amplifier power
Brand Value Proposition: MTX Audio has built a reputation for high-performance car audio components since 1982. Emphasize their history of innovation and motorsport heritage when marketing to enthusiasts. Their Thunderform enclosures combine enclosure and subwoofer design for simplified installation.
DIY Replacement Guide for MTX Audio Components
Upgrading or replacing your MTX audio components—such as speakers, amplifiers, and subwoofers—can significantly enhance your vehicle’s sound system. This guide walks you through the necessary tools, safety measures, and step-by-step procedures to ensure a successful installation with minimal hassle.
Safety Warning: Always disconnect the battery before working on electrical systems in your vehicle. This prevents accidental short circuits, damage to electronics, or personal injury from electric shock.
Essential Tools and Materials
Before starting your replacement project, gather the following tools and materials to streamline the process:
- Screwdrivers – Both flathead and Phillips for removing panels and mounting hardware.
- Wire cutters and strippers – For cleanly cutting and preparing wires for connection.
- Electrical tape or heat-shrink tubing – To insulate and protect exposed wire connections.
- Zip ties – For securing wiring neatly and maintaining a clean installation.
- Multimeter (optional) – Useful for testing voltage and ensuring proper connections.
Step-by-Step Installation Guide
- Power Down the System
- Turn off the vehicle's ignition and audio system completely.
- Disconnect the negative terminal of the car battery to prevent any electrical shorts during installation.
- Remove Old Components
- Use a screwdriver to remove any screws or fasteners securing the old speaker, amplifier, or subwoofer.
- Gently pull out the component while being cautious of connected wiring harnesses and terminals.
- Disconnect Wires Safely
- Label each wire or connector using masking tape and a marker for easier reassembly.
- Cut zip ties or peel back electrical tape holding bundles together, then carefully disconnect each wire from the component.
- Prepare New Component
- Compare the wiring configuration of the new MTX component with the old one to ensure compatibility.
- If necessary, strip the ends of any bare wires to expose enough conductor for a secure connection.
- Connect Wiring Securely
- Attach each labeled wire to its corresponding terminal on the new component.
- Secure connections with electrical tape or heat-shrink tubing to prevent fraying or shorts.
- Use zip ties to bundle wires neatly and route them away from moving parts or sharp edges.
- Mount the New Component
- Slide the new speaker, amplifier, or subwoofer into position within the mounting location.
- Secure it using the original screws or appropriate replacements if needed.
- Final Testing
- Reconnect the battery’s negative terminal securely.
- Turn on the audio system and test all channels and volume levels to confirm everything is functioning correctly.
- Listen for distortion, buzzing, or other anomalies that may indicate loose connections or improper grounding.
Component Type | Special Considerations | Estimated Time | Difficulty Level |
---|---|---|---|
Speakers | Ensure correct polarity when connecting wires (positive/negative). | 30–45 minutes per pair | Easy |
Amplifiers | Verify power and ground connections; use inline fuses for protection. | 1–2 hours | Moderate |
Subwoofers | Check enclosure fit and impedance match with amplifier. | 1–3 hours | Moderate to Advanced |
Pro Tip: When replacing subwoofers, double-check the impedance rating (ohms) to ensure compatibility with your existing amplifier. Mismatched impedance can cause overheating or damage to both the subwoofer and amp.
Replacing MTX Subwoofers: Detailed Steps
Subwoofers often require more attention due to their size and power requirements. Follow these specific steps for optimal results:
- Disconnect Power Source
- Turn off the audio system and unplug any external power sources.
- Remove the negative battery cable to eliminate risk of electrical issues during installation.
- Access the Subwoofer Enclosure
- Depending on your setup, you may need to remove panels or access points to reach the subwoofer.
- Use a screwdriver to detach the enclosure or cabinet containing the subwoofer.
- Disconnect and Remove Old Subwoofer
- Label and disconnect all wiring connected to the old subwoofer.
- Unscrew the mounting brackets or rings securing the subwoofer to the enclosure.
- Lift the old unit out carefully without damaging surrounding components.
- Install New MTX Subwoofer
- Place the new subwoofer into the enclosure, aligning it properly with the cutout or mounting holes.
- Secure it using the provided hardware or original screws, tightening evenly to avoid warping the frame.
- Reconnect the wiring according to the labels and ensure all connections are tight and insulated.
- Final Setup and Test
- Reassemble any panels or covers removed earlier.
- Restore power by reconnecting the battery and turning on the audio system.
- Play various types of music to test bass response and ensure there are no rattles or distortion.
Installation Note: If your MTX subwoofer requires an external amplifier, make sure to run power and ground cables properly, avoiding sharp bends or pinching points behind panels. Use grommets where wires pass through metal surfaces to prevent chafing over time.
Conclusion
Replacing MTX audio components is a rewarding DIY task that can dramatically improve your listening experience. With the right tools, a careful approach, and attention to detail, even beginners can complete this upgrade successfully. Whether you're swapping out a blown speaker, upgrading an amplifier, or installing a powerful new subwoofer, following this guide will help ensure your MTX audio system delivers clear, high-quality sound for years to come.
How to DIY and Replace Tundra Light Bar
Replacing the light bar on your Toyota Tundra can be a rewarding DIY project that enhances both the aesthetics and functionality of your vehicle. With basic mechanical skills, the right tools, and proper preparation, you can complete this upgrade without needing professional assistance. However, it's crucial to consult your manufacturer’s manual for specific instructions related to your model year and trim. Additionally, ensure the new light bar is fully compatible with your Tundra's electrical system and mounting points before beginning the installation.
Safety Warning: Always disconnect the battery before working with electrical components to avoid short circuits or damage. Ensure the vehicle is parked on a level surface and all tools are properly grounded if using power tools.
Step-by-Step Replacement Guide
- Parking and Preparation
- Park your Tundra on a flat, stable surface to prevent movement during the replacement process.
- Turn off the ignition and engage the parking brake to ensure safety while working.
- Gather necessary tools: screwdriver set (both Phillips and flathead), socket wrench, wire cutters/strippers, electrical tape, zip ties, and a multimeter (optional but helpful).
- Accessing the Light Bar
- Open the rear door or tailgate to gain better access to the light bar assembly located above the rear window.
- If replacing a roof-mounted light bar, you may need to remove interior headliner panels or weatherstripping to access wiring connections safely.
- Removing the Old Light Bar
- Locate and remove the screws or bolts securing the existing light bar in place. These are typically found along the edges of the light bar housing.
- Use a screwdriver or appropriate socket to carefully loosen and remove fasteners. Place them in a secure container to avoid losing them.
- Gently pull the old light bar away from its mount. If resistance is encountered, check for additional clips or fasteners that might be hidden under weatherstripping or trim pieces.
- Disconnecting Electrical Components
- Identify the wiring harness connected to the back of the light bar. Press the locking tab and gently pull the connector apart to disconnect it.
- If your light bar has an inline fuse or relay, locate and remove it from the fuse box to isolate the circuit completely.
- Inspect the wiring for signs of wear, corrosion, or damage. Take photos or notes for reference when installing the new unit.
- Installing the New Light Bar
- Position the new light bar in the same location as the original, ensuring proper alignment with existing mounting holes.
- If the previous mounting hardware shows signs of rust or wear, replace it with new stainless steel screws or bolts for durability and longevity.
- Secure the light bar in place by tightening the fasteners evenly to avoid warping the housing or damaging the mounting surface.
- Connecting the Wiring
- Match the wiring harness from the new light bar to your vehicle's existing harness. Make sure the positive (+) and negative (-) terminals are correctly aligned.
- Firmly plug the connectors together until you hear a click indicating a secure connection. If splicing wires, use heat-shrink tubing or electrical tape to insulate connections.
- Route any excess wiring neatly using zip ties to keep the area organized and free from potential snagging or pinching.
- Restoring Power and Testing
- If a fuse or relay was removed earlier, reinstall it into the appropriate slot in the fuse box.
- Reconnect the vehicle’s battery if previously disconnected, making sure the terminals are clean and securely fastened.
- Turn on the ignition and activate the light bar switch to test the operation of the new light bar. Observe whether all sections illuminate evenly without flickering or dim spots.
Phase | Key Tasks | Common Issues | Recommended Tools |
---|---|---|---|
Preparation | Verify compatibility, gather tools, park safely | Using incorrect light bar model, missing tools | Owner’s manual, screwdriver set, flashlight |
Removal | Remove fasteners, detach wiring, inspect wiring | Forgetting to disconnect battery, damaged connectors | Socket wrench, pliers, wire cutters |
Installation | Mount new bar, connect wiring, route cables | Misalignment, improper polarity, loose connections | Zip ties, multimeter, electrical tape |
Testing | Restore power, test lights, check for issues | Blown fuses, non-functioning LEDs, intermittent lighting | Test light, spare fuses, voltmeter |
DIY Tip: Before purchasing a new light bar, consider upgrading to an LED version for improved brightness, energy efficiency, and longer lifespan. Also, label each wiring connection with masking tape and a marker during removal to make reinstallation easier and more accurate.
Final Tips for a Successful Installation
- Double-check all wiring connections for tightness and correct polarity to avoid damaging the new light bar or vehicle electronics.
- If your new light bar includes a different wiring configuration than the original, refer to the included installation guide for specific instructions.
- Seal any gaps around the light bar with weatherstripping or silicone sealant to prevent water intrusion and maintain a clean appearance.
- Consider adding a dedicated switch or integrating the light bar into your existing lighting controls for added convenience.