All categories
Featured selections
Trade Assurance
Buyer Central
Help Center
Get the app
Become a supplier
Trục sau bên trái
(Có 999+ sản phẩm)
2025-11-23
Alibaba
Phụ tùng & phụ kiện xe
Hệ thống truyền động ô tô
Trục cánh quạt
Previous slide
Next slide
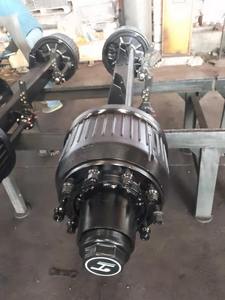
Ổ trục trái phía sau trục phù hợp với 2006-2017 Mercedes Sprinter 3-t, 4-T, 5-t,6-t w906 oe9063503810
$62.70-69.20
Đơn hàng tối thiểu: 5 pieces
Previous slide
Next slide
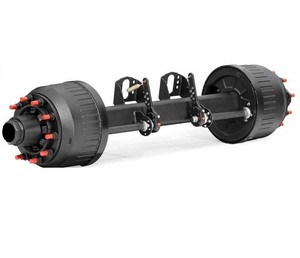
Cầu xe Mỹ mới, xuất xưởng trực tiếp, cụm cầu sau, cầu vi sai, lắp ráp cầu sau, dùng cho xe đầu kéo, xe kéo đa dụng, tiết kiệm chi phí
240-280 US$
Đơn hàng tối thiểu: 1 Cái
Previous slide
Next slide
1800kg Xoắn trục với cơ khí trống phanh hoặc thủy lực bán buôn
263-290 US$
Đơn hàng tối thiểu: 50 Cái
Previous slide
Next slide
Chuyên nghiệp tùy chỉnh các bộ phận Trailer trục thẳng, các bộ phận giả mạo, và trục Trailer
0,50-2 US$
Đơn hàng tối thiểu: 10 Cái
Previous slide
Next slide
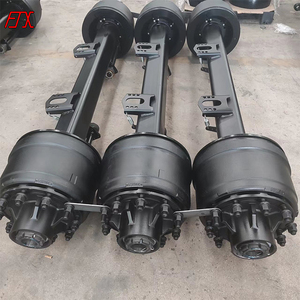
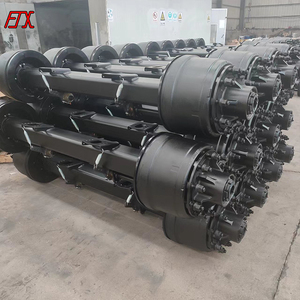
Bán buôn 14 16 tấn Đức loại xe tải bán Trailer phần phía sau hệ thống treo trục bán hàng
550-650 US$
Đơn hàng tối thiểu: 20 Cái
Previous slide
Next slide
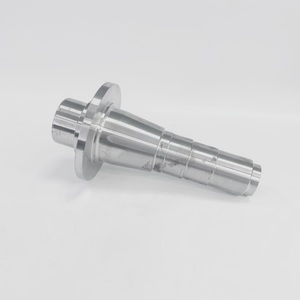
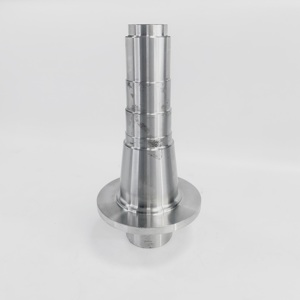
Nhà máy Phụ tùng ô tô Nhà cung cấp phía sau CV trục trái ổ trục cho BMW 325 2.5L 33211227585, 33211229300, 33211229428, 33211229495
10-60 US$
Đơn hàng tối thiểu: 2 Cái
Previous slide
Next slide
Epx phụ tùng ô tô xe trục lắp ráp phía sau phía trước CV trục trái bên phải ổ trục cho Chevrolet Volt 11-19 22816826
Sẵn sàng vận chuyển
31-38 US$
Đơn hàng tối thiểu: 4 Cái
Previous slide
Next slide
Gjf truyền động tự động hệ thống bên trái phía sau ổ trục CV trục cho Toyota Sienna 2.7 3.5 2WD gsl35 2010- C-TO168A-8H
32,85-38,85 US$
Đơn hàng tối thiểu: 4 Cái
1
2
3
4
5
More pages
32
Các danh mục hàng đầu
Phụ tùng ô tô hiệu suất cao
Hệ thống thân vỏ ô tô
Bánh, Lốp & Phụ kiện
Các bộ phận đa năng
Hệ thống điện xe hơi
Phụ tùng & phụ kiện xe máy
Phụ tùng & bộ phận đường biển
Hệ thống chiếu sáng tự động
Hệ thống nội thất
Phụ tùng & phụ kiện xe buýt
Động cơ xe hơi
Hệ thống truyền động ô tô
Hệ thống phanh ô tô
Các thiết bị & phụ tùng tàu hỏa
Phụ tùng & phụ kiện đường ray
Phụ tùng & phụ kiện cho xe chạy bằng năng lượng mới
Previous slide
Next slide
Các tìm kiếm liên quan:
trục sau Trung Quốc
trục sau ac16
trục sau 25t
trục sau 36
trục phía sau 35t
các loại trục sau
trục sau của một công ty
trục sau 16 tấn
thay thế trục sau
trục sau Chevy
trục sau của ô tô
các loại trục sau
trục sau của sản phẩm
trục sau Mỹ
trục sau OEM